Choosing a smart lock for an aluminum profile door involves more than comparing fingerprints, passwords, and app features. The frame may look slim, yet its internal cavity, lock body, and reinforcement determine whether installation will succeed. This guide explains how to install a smart lock on an aluminum profile door with practical checks before drilling. It is written for homeowners, installers, and buyers evaluating China-made smart lock options.
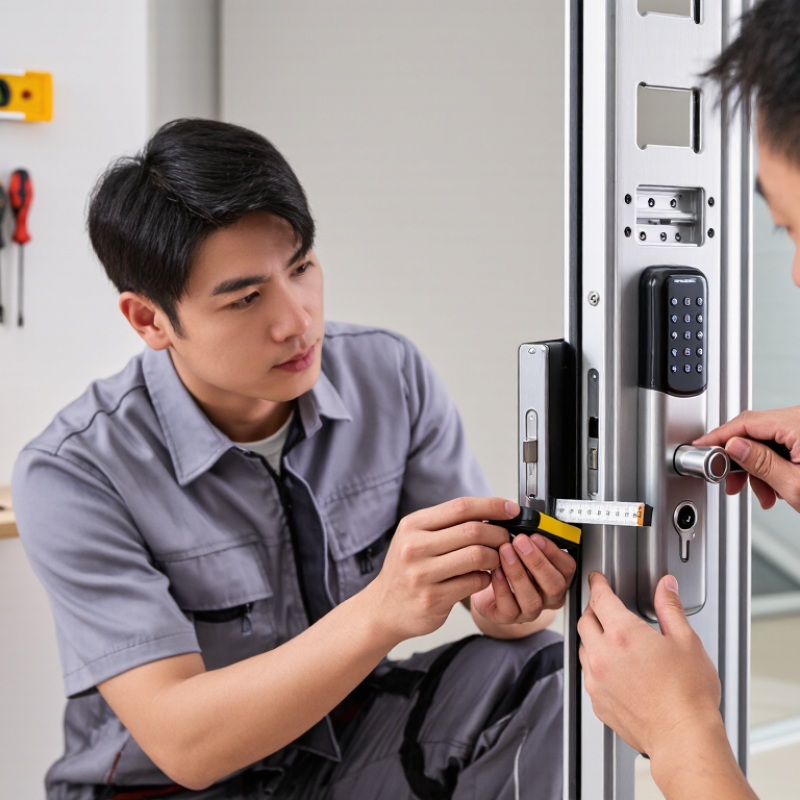
Real installation experience shows that measurements matter more than attractive packaging. Check door thickness, opening direction, mortise dimensions, cylinder position, and available clearance around the handle. A steel ruler, masking tape, screwdriver set, drill, and level are usually useful. But tools alone cannot correct a mismatched lock case. Not every aluminum door is ready. Thin profiles may need a compatible mounting plate or professional reinforcement. Forcing screws into an unsupported section can deform the frame and weaken alignment.
Reliable instructions should match the manufacturer’s template, wiring diagram, and access-control requirements. Confirm battery type, emergency power method, weather exposure, and manual override before final fitting. Keep the door open during testing, then check smooth locking, app response, and mechanical release several times. Small errors appear quickly. A latch that scrapes today may fail after seasonal movement or repeated use. This overview will separate preparation, fitting, calibration, and troubleshooting, while noting where a qualified technician is safer. Some steps vary by model; that limitation deserves attention, not guesswork.
Choosing a Smart Lock for an Aluminum Door
Aluminum doors often have narrow frames, hollow profiles, or compact mortise cases. A smart lock must match these physical limits. Measure the door thickness, backset, handle spacing, and cylinder length before buying. A lock designed for timber doors may press against the frame or fail to align with the latch.
Fortune Business Insights estimated the global smart lock market at about USD 2.49 billion in 2023. Its report also forecasts strong growth through 2032. This expansion does not make every lock suitable for aluminum doors. Choose a model supporting the existing mortise or a surface-mounted design. Check torque requirements, battery access, weather resistance, and emergency entry. Certified testing under recognized security standards adds useful evidence, but certification alone cannot correct poor installation.
Tips: Place the lock body on a flat, reinforced section. Avoid relying only on adhesive. Add suitable backing plates when the aluminum profile flexes. Keep the keypad away from direct rain. Test locking ten times with the door open, then closed. Small alignment errors matter.
A common mistake is choosing features before checking dimensions. Wi-Fi access, fingerprints, and temporary codes are convenient, yet they cannot compensate for a weak frame. The door should close smoothly by hand first. If it scrapes, fix that problem before installing electronics. Industry reports provide market direction, not a guarantee for your doorway. Consider an on-site measurement by a qualified installer when the frame is thin, glazed, or unusually narrow.
Before installing a smart lock on an aluminum door, check the door structure carefully. Aluminum panels may be hollow, thin, or reinforced only around the existing lock. Measure the door thickness, backset, lock height, and distance from the handle to the frame. A digital caliper helps when the edge profile is narrow. Also inspect the latch, cylinder, and strike plate. They must align with the smart lock’s required dimensions.
Check the door swing and available clearance on both sides. Some aluminum doors use multipoint locks, narrow stile sections, or glass panels, which may limit compatibility. Do not drill immediately. Remove the interior trim and look for hidden reinforcement, wiring, or drainage channels. I have seen rushed installations damage thin metal and weaken the latch area. That mistake is expensive to correct.
Prepare a stable, clean work area before fitting anything. Keep the door open and supported, then mark holes with a removable pencil. Use the correct drill bit for aluminum and avoid excessive pressure, which can distort the panel. Confirm that the frame can accept the new strike plate without blocking the seal. Check the door closes smoothly by hand. If the latch already binds, solve that problem first. It is easy to blame the lock later. Keep the original screws and parts nearby; some may still be needed for reinforcement.
China Best How to Install a Smart Lock on Aluminum Doors
Removing existing hardware carefully prevents scratches and reveals the door’s real structure. Open the door and support it before loosening screws. Remove the interior handle, exterior plate, spindle, and latch assembly. Keep each screw nearby, although some may be too worn for reuse. Aluminum frames can bend easily, so never force a stuck component with excessive pressure. A plastic pry tool protects the painted surface better than a metal screwdriver.
Measure the door with a steel tape, not a flexible ruler. Record the door thickness, latch backset, and distance from the door edge to the frame. Measure at the top, middle, and bottom because older aluminum doors may not be perfectly square. Check the available space around the lock body, especially near glass panels and reinforcing rails. Close the door slowly and inspect whether the latch meets the strike plate evenly. I once measured only the center section, and the lower edge later caused alignment problems. That small mistake was avoidable.
Tips: Photograph the original hardware before removal. Mark each measurement clearly. Check the installation guide against your actual dimensions. If the door feels hollow, avoid overtightening screws. It can deform the skin. Test the door manually before connecting power, then check locking and unlocking several times. A slightly loose fit is not always harmless, so reassess the alignment before final tightening.
| Stage | Task or Data Point | Recommended Measurement or Condition | How to Check | Installation Relevance |
|---|---|---|---|---|
| 1. Preparation | Confirm the door material | Aluminum frame or aluminum-clad door; identify any glass, thin panels, or reinforced sections. | Inspect the door edge, face, and lock area before removing hardware. | Aluminum doors may have hollow sections and require suitable fasteners or an adapter plate. |
| 2. Safety | Disable or secure the existing locking system | Keep the door open during removal and retain the key until the new lock is tested. | Place a doorstop under the door and avoid closing it while the lock is removed. | Prevents accidental lockout and reduces stress on the hinges and latch. |
| 3. Remove Existing Hardware | Remove interior and exterior handles or escutcheons | Remove screws gradually and support both sides of the hardware. | Use the correct screwdriver or hex key; do not pry against the aluminum surface. | Prevents stripped screws, bent trim, and scratches on the door face. |
| 4. Remove the Cylinder | Release the existing cylinder retaining screw | The retaining screw is normally located on the narrow door edge near the cylinder. | Align the key cam with the cylinder body, then pull the cylinder out without forcing it. | A misaligned cam can prevent cylinder removal and may damage the lock case. |
| 5. Remove the Lock Case | Take out the latch or mortise lock body | Remove edge-plate screws and gently withdraw the lock case from the door pocket. | Stop if the case catches on internal reinforcement or concealed cables. | Aluminum doors can contain internal sections that restrict the available lock depth. |
| 6. Measure Backset | Measure from the door edge to the lock centerline | Record the exact backset in millimeters; common residential sizes include approximately 60 mm or backset as specified by the existing lock. | Measure from the edge face to the center of the spindle or cylinder hole. | The smart-lock body and latch must match the existing centerline or use a compatible adapter. |
| 7. Measure Door Thickness | Measure the complete door slab thickness | Measure at the lock area, including skins, trim, and overlays; record the result in millimeters. | Use digital calipers or a ruler at the edge where the lock is installed. | The mounting screws and spindle must be long enough without bottoming out or bending. |
| 8. Measure Lock-Cylinder Position | Check the vertical and horizontal position of the existing opening | Record the distance from the top or bottom reference point and from the door edge. | Use a square and tape measure; take measurements from consistent reference edges. | Correct positioning keeps the interior unit clear of glass, rails, and decorative trim. |
| 9. Check Door Alignment | Inspect the gap between the door and frame | The door should close smoothly without lifting, rubbing, or requiring excessive force. | Close the door slowly and observe whether the latch aligns with the strike opening. | A smart lock cannot reliably compensate for a misaligned door or frame. |
| 10. Check the Strike | Compare the latch position with the frame strike | The latch should enter the strike opening centrally and fully when the door is closed. | Apply light pressure to the door and test the latch manually before installation. | Poor alignment can cause motor overload, incomplete locking, or premature battery drain. |
| 11. Verify Mounting Surface | Check flatness and available fixing points | The mounting plate should sit flat and should not bridge a curved profile or unsupported thin panel. | Place the mounting plate over the door and check for rocking or gaps. | A stable mounting surface prevents movement and protects the aluminum from distortion. |
| 12. Select Fasteners | Choose fasteners compatible with aluminum construction | Use only the fastener type and length specified for the lock and the door structure. | Confirm that screws do not interfere with glass, wiring, or the opposite door face. | Incorrect screws may strip the aluminum, contact internal parts, or weaken the door skin. |
| 13. Install the Smart Lock | Fit the latch, spindle, mounting plate, and interior unit | Keep the spindle and latch square to the door and tighten screws evenly by hand. | Operate the lock with the door open before closing it. | Hand-tightening reduces the risk of crushing thin aluminum sections or deforming trim. |
| 14. Manual Function Test | Test locking and unlocking before electronic setup | The thumb-turn or interior mechanism should rotate smoothly with minimal resistance. | Test at least three complete lock and unlock cycles with the door open. | Mechanical binding should be corrected before batteries or electronic calibration are added. |
| 15. Electronic Test | Install batteries and complete calibration | Follow the lock's installation sequence and keep the door open during initial calibration. | Run several powered cycles, then test with the door closed. | Calibration with the door open helps prevent a motor stall or accidental lockout. |
| 16. Final Inspection | Confirm security, alignment, and finish quality | All screws should be secure, the lock should be centered, and the door should close without force. | Inspect both door faces and the edge for movement, gaps, scratches, or loose trim. | A final inspection confirms reliable operation and avoids damage to the aluminum door. |
Before drilling, check the aluminum door’s thickness, lock body, and frame clearance. Measure twice. Aluminum profiles differ, even on doors that look identical. Remove the existing handle and cylinder carefully. Keep the screws in a small tray. Place the installation template over the door edge, then mark each hole with a fine pencil. Avoid forcing the drill, because thin aluminum can deform.
Fit the exterior keypad or reader first. Guide its cable through the prepared opening without sharp bends. Align the spindle with the lock mechanism. From inside, position the mounting plate and tighten the screws evenly. Do not overtighten them. A distorted plate can make the latch rub against the strike. Connect the interior control cable, then install the battery compartment. Keep the battery disconnected during mechanical adjustments.
Leave the door open during the first test. Turn the thumb-turn several times and check smooth movement. Then close the door gently and test the latch again. Program the access code according to the installation instructions. Test the backup entry method while the door remains open. I once tightened the mounting plate too early, and the bolt shifted slightly. Rechecking the alignment fixed it. If resistance remains, inspect the strike position before enlarging any opening. Cycle the lock at least twenty times and examine every screw afterward.
After mounting a smart lock on an aluminum door, test the mechanics before connecting power. Check that the door closes without rubbing. The deadbolt should extend smoothly and fully. Do not over-tighten screws. Aluminum frames can deform under pressure. I once treated a slight scrape as harmless; it later caused failed locking cycles. Use a thin alignment shim when needed.
Run at least 20 lock-and-unlock cycles from inside and outside. Test the keypad, mobile connection, manual key, interior thumb-turn, and low-battery warning. Record failed attempts. MarketsandMarkets projected the smart-lock market to grow from about USD 2.2 billion in 2023 to USD 4.4 billion by 2028. More installations also mean more connection errors to investigate. Keep the door open during the first remote test. Confirm the lock status changes correctly before closing it.
Connect the lock through its recommended wireless network, then update its firmware. Use a strong, unique account password and enable multi-factor authentication where available. NIST guidance treats authentication strength and recovery controls as essential security factors. Check user permissions after pairing. Remove temporary access codes immediately.
Every six months, inspect mounting screws, battery contacts, and the aluminum strike plate. Clean dust with a dry cloth. Avoid spraying lubricant near electronic parts. Replace batteries before the warning becomes urgent. Wi-Fi performance may change after installation; that is easy to overlook. Record the installation date and test results, even if the lock seems perfect.
Measure the door thickness, latch backset, lock height, and frame clearance. Check whether the panel is hollow, thin, or reinforced. Inspect the latch, cylinder, and strike plate. Small differences can cause large problems.
Aluminum doors may contain hidden reinforcement, wiring, or drainage channels. Remove the interior trim and inspect carefully. Drilling blindly can weaken thin metal. That repair may become expensive.
Use a steel tape and, if necessary, a digital caliper. Measure the top, middle, and bottom sections. Record every distance clearly. Do not trust one measurement.
Support the open door before loosening screws. Remove the handles, plates, spindle, cylinder, and latch carefully. A plastic pry tool helps prevent scratches. Keep the screws in a small tray.
Keep the door open, stable, and supported. Mark holes with a removable pencil. Use a drill bit suitable for aluminum. Apply light pressure, because excessive force can distort the panel.
Place the template over the door edge and mark each opening. Fit the exterior keypad or reader first. Guide the cable without sharp bends. Align the spindle before tightening the interior plate.
Stop tightening the screws. Check the strike plate and door alignment first. A crooked plate can create resistance. I once blamed the lock, but the frame was actually misaligned.
Keep the door open during the initial mechanical test. Turn the thumb-turn several times. Then close the door gently and test the latch. Cycle the lock at least twenty times.
No, keep the battery disconnected while adjusting the mechanism. Confirm smooth manual movement first. Then connect power and program the access code. Test the backup entry method with the door open.
Installing a smart lock on an aluminum profile door requires careful product selection, accurate preparation, and systematic testing. Begin by choosing a lock that matches the door’s thickness, frame structure, locking method, and power requirements. Check whether the door and frame provide enough clearance for the lock body, keypad, sensor, and wiring. Before installation, clear the work area, gather the necessary tools, and protect the aluminum surface from scratches. Remove the existing hardware carefully, then measure the door edge, handle position, hole spacing, and lock alignment to ensure all components will fit correctly.
To learn how to install a smart lock on an aluminum profile door, follow the installation instructions step by step. Secure the interior and exterior components without overtightening, connect any required cables, and install batteries or another approved power source. Test the latch manually first, then check keypad, fingerprint, card, app, or other available functions. Finally, confirm that the door locks and unlocks smoothly, review access settings, and maintain the system by replacing batteries, cleaning sensors, and inspecting screws regularly.

Med Door