When it comes to home improvements, the doorway is often overlooked. However, ensuring that a door opening is properly measured for a custom replacement is crucial. According to the National Association of Home Builders, incorrect measurements can lead to increased costs and extended renovation times. This highlights the importance of learning how to measure a door opening for a custom replacement accurately.
Custom door replacements can enhance both aesthetics and functionality. In fact, a well-fitted door can improve energy efficiency by up to 15%. Many homeowners underestimate this critical step in the replacement process. They often rush the measurement, potentially leading to misfits. The impact of such errors can ripple through other renovations, adding unnecessary complexity.
Taking the time to learn proper techniques for measuring door openings is invaluable. It may seem straightforward, but a minor oversight can have significant consequences. With the right knowledge and tools, you can avoid common pitfalls. This guide offers ten essential tips to ensure you get it right the first time, saving yourself time and stress later on.
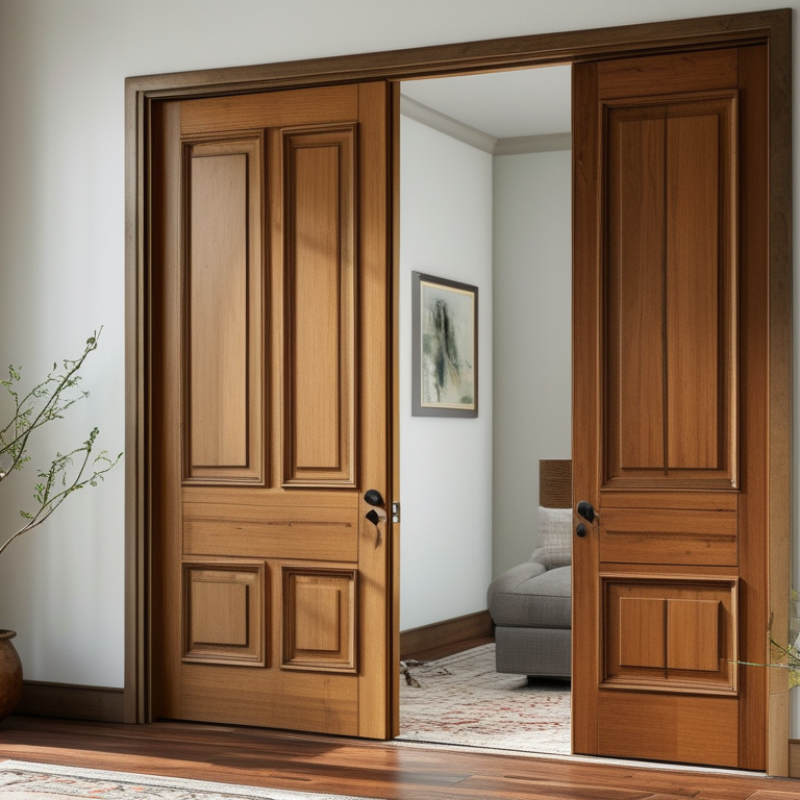
When measuring a door opening, understanding door types and frames is essential. There are various door styles, including hinged, sliding, and bi-fold. Each type has distinct measurement requirements due to their unique construction and installation methods. Hinged doors typically require the most straightforward measurements, focusing on height and width, while sliding doors need additional attention to the track dimensions.
Frames also play a significant role in the measurement process. A standard door frame consists of the header, two side jambs, and a threshold. When measuring, consider not just the door size but also the frame's dimensions. Ensure that there is a slight clearance for smooth operation. Additionally, check if the frame is square. An unlevel frame can lead to complications during installation. Taking accurate measurements while accounting for frame variations can save time and reduce mistakes.
Every door installation is unique. Small inconsistencies in measurements can cause problems later. It's crucial to measure multiple times and be meticulous with your calculations. Remember, a slight error can lead to a door that doesn't fit. Emphasizing these details can better prepare you for a successful replacement project.
Gathering the right tools is crucial when measuring a door opening for a custom replacement. A tape measure is the cornerstone tool. Use a metal tape for precision. Experts recommend taking three measurements: height, width, and depth. Each measurement should be recorded at least twice to minimize errors. According to the National Association of Home Builders, a mere 1/8-inch difference can lead to an ill-fitting door.
In addition to a tape measure, a level is essential to verify that your measurements are aligned correctly. Skewed measurements can lead to complications during installation. Adding a notepad helps keep your data organized. Record all details, including any unevenness in wall surfaces. Research has shown that 30% of DIY projects fail due to inadequate preparation. Thus, don’t overlook the importance of thorough measurements.
It’s easy to rush the process. Many people make the mistake of assuming dimensions based on old doors. This can lead to costly material waste. Precision matters, and it’s better to take extra time than to deal with future inconsistencies. Always double-check your measurements before proceeding. Recognizing common pitfalls in this step can prevent delays later on.
Measuring the height and width of a door opening requires precision. This ensures that your custom replacement fits seamlessly. Begin by using a reliable tape measure. Measure from the floor to the top of the opening for height. Record this number. Keep in mind that uneven floors can affect measurements. Industry studies show that 70% of replacement door failures occur due to incorrect measurements.
Next, measure the width. Check the opening at the top, middle, and bottom. This accounts for any potential irregularities. The largest measurement is the one to use. A report from the Door and Window Manufacturers Association noted that accurate width measurements can reduce installation time by up to 30%.
Consider the overall structure. If your walls have settled over time, this can alter measurements as well. Reflect on how this impacts fit. Double-check each measurement to avoid costly mistakes. Inaccurate measurements can lead to gaps and drafts. Taking the time to measure correctly prevents these issues. Proper measuring techniques can save you both time and money on a project that reflects your personal style.
| Tip Number | Measurement Aspect | Description |
|---|---|---|
| 1 | Height Measurement | Measure from the top of the door frame to the bottom to get the full height. |
| 2 | Width Measurement | Measure the width at the top, middle, and bottom of the opening; use the smallest measurement. |
| 3 | Depth Measurement | Measure the depth of the door frame (if applicable) to ensure a proper fit. |
| 4 | Check for Level | Use a level to check that the top of the door frame is straight. |
| 5 | Inspect Surrounding Area | Look for any obstructions or irregularities around the opening. |
| 6 | Measurements for Frame Configuration | Consider the style of frame (intrusive, flush, etc.) when measuring. |
| 7 | Note Hinge Placement | Identify where hinges will be placed to ensure proper function. |
| 8 | Consider Door Swing Direction | Determine if the door will swing inwards or outwards. |
| 9 | Account for Threshold Height | Measure any thresholds that could affect height measurement. |
| 10 | Double Check All Measurements | Always re-check your measurements to avoid mistakes. |
When measuring a door opening for custom replacement, accounting for door thickness and clearances is critical. Industry research indicates that the average door thickness ranges from 1.375 inches to 1.75 inches. This small difference can influence the overall fit of the door. An improperly measured thickness can lead to gaps or interfere with the door's functionality.
Clearances are equally important. A standard clearance of 1/8 inch on the hinge side ensures smooth operation, while maintaining a 1/4 inch gap at the bottom can accommodate flooring variations. Failing to allow for these clearances may result in expensive adjustments later. It's essential to measure from the highest point of the floor to the bottom of the existing door frame for accuracy. Many homeowners overlook this step, risking a poor fit that affects insulation and security.
Consider potential discrepancies, like wall irregularities or settling foundations. These factors can introduce challenges when installing a new door. Make sure to double-check measurements to avoid costly mistakes. A systematic approach to accounting for these variables will enhance the likelihood of a successful installation, ensuring the door operates effectively and fits well within the frame.
When measuring a door opening for custom replacement, precision is key. Double-checking measurements can save you time and money. Start by measuring the width and height of the door opening. A tape measure works well, but make sure it’s straight. It’s often easy to misread measurements if the tape bends or slips.
Consider potential obstacles that might affect the fit. Light fixtures above the door can limit height. Trim or moldings can impact width measurements. If your first measurement seems off, take a second look. Small discrepancies can lead to significant issues during installation.
After taking measurements, record them clearly. Use a recent and accurate measuring tool. Compare your results with other measurements. This helps catch mistakes early. It’s crucial to maintain an organized approach. If things seem inconsistent, rethink your method. Each step matters. Accuracy today avoids problems tomorrow.
: Common door types include hinged, sliding, and bi-fold doors. Each has unique measurement needs.
Measure the header, side jambs, and threshold. Ensure some clearance for smooth operation.
An unlevel frame can complicate installation. Take care to check if the frame is square.
Average door thickness ranges from 1.375 to 1.75 inches. This can affect the door's fit.
Keep a 1/8 inch gap on the hinge side and a 1/4 inch gap at the bottom for flooring.
Measure multiple times, check for ceiling fixtures or moldings, and record results clearly.
Small errors can lead to doors that don't fit properly, affecting functionality and aesthetics.
Rethink your measuring method. Accurate measurements are crucial for a successful installation.
Settling foundations can change door openings, so check for discrepancies to avoid complications.
Double-checking helps save time and money by catching potential mistakes early in the process.
Measuring a door opening accurately is crucial when considering how to measure a door opening for a custom replacement. The process begins with understanding the different types of doors and their frames, which can vary significantly in design and structure. Equip yourself with the necessary tools to ensure precise measurements, and follow a step-by-step guide to measure both the height and width of the opening.
It’s important to account for the door's thickness and any clearances, as these factors will affect how well the replacement door fits. Lastly, double-check your measurements to ensure accuracy, as even minor discrepancies can lead to installation challenges. By following these tips, you can confidently measure your door opening and facilitate a smooth replacement process.

Med Door